
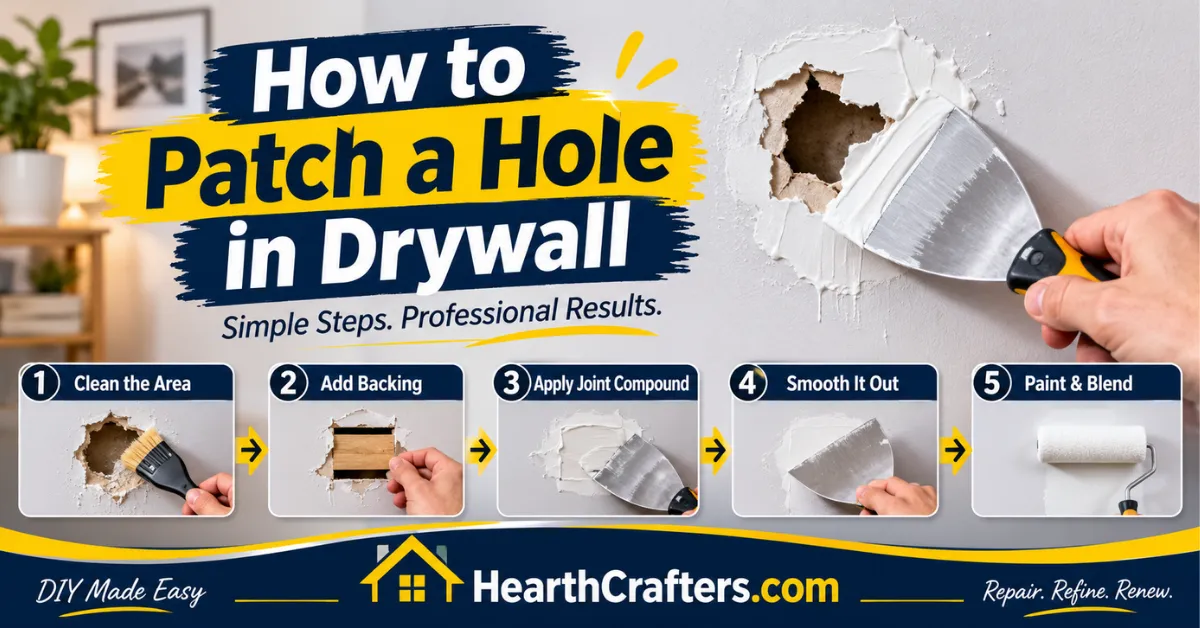
How to Patch a Hole in Drywall: Easy Steps, Seamless Finish
Quick Answer
To patch a hole in drywall with mesh, clean up the damaged edges, then press a self-adhesive mesh patch over the hole so it overlaps the edges by at least 1 inch. Cover it with thin coats of joint compound, letting each coat dry and feathering the edges wider each time. Sand lightly, prime, and paint. Mesh patches suit small holes; bigger holes need a drywall insert.
Introduction
A doorknob dent, a removed TV mount, or a hole from moving furniture is one of the most common wall repairs in a house. It is also one of the easiest to do well, as long as you match the repair method to the size of the hole.
This article focuses on the mesh patch method. It covers how to know whether mesh is right for your hole, how to finish the repair so it disappears under paint, and what to do when the hole is too big for a mesh patch alone.
Is a Mesh Patch the Right Fix for Your Hole?
The repair method depends on hole size, and published guidance differs a little on exactly where the cutoffs fall. Home Depot’s guidance treats holes larger than about 4 inches across as a cut-and-fit repair, while This Old House describes holes larger than 6 inches as needing a drywall insert held by backing boards. Lowe’s describes the same split: mesh patch kits for small holes, and a cut-in drywall piece secured to studs or furring strips for medium and large ones.
| Damage | Typical fix | Mesh patch? |
|---|---|---|
| Nail or screw holes | Lightweight spackle | No |
| Dents and holes up to a few inches (doorknob, anchor holes) | Self-adhesive mesh or metal-backed patch plus joint compound | Yes |
| Holes roughly 4–6+ inches | Cut-in drywall piece with backing, taped seams | Mesh tape on the seams only |
| Water-stained, soft, or crumbling drywall | Find and fix the moisture source first | No |
Spackle alone is not the answer for anything larger than a small nail hole. Bob Vila warns that compound packed into a larger hole tends to crumble after it dries, which is why a mesh patch gives the compound something to grip.
Mesh patch vs. metal-backed patch: A fiberglass mesh patch is thin, flexible, and the easiest choice for small holes. Some kits add a thin galvanized steel plate behind the mesh for extra rigidity, which helps when a hole is a little too wide for mesh to bridge cleanly. Houzz notes that either type disappears after proper feathering, so a bulge usually means too little feathering, not the patch itself.
Before You Start: Safety and Checks
Most wall patches are low-risk, but check these first:
- Homes built before 1978 may have lead paint. EPA recommends contacting a certified professional to test the surfaces you plan to renovate, and it advises containing your work area so dust doesn’t spread through the house. The risk comes from dust created by sanding or scraping, so avoid dry-sanding old painted surfaces until you know what’s on them. A small mesh patch usually only needs light sanding of new compound, but if you need to sand or scrape the old paint around the hole, test first.
- Older joint compound can be a concern too. In older homes (roughly before the 1980s), some wall compounds may have contained asbestos. This article’s research did not verify specific dates, so if your home is that old and you plan to sand or cut, check with your local health department or a qualified tester first.
- Watch for wiring and pipes. If the hole is near an outlet, switch, or plumbing, don’t enlarge it or cut around it until you know what’s behind the wall. Turn off power at the breaker if wires are visible.
- Check why the hole is there. If the drywall around it is damp, stained, soft, or moldy, the real problem is moisture. Patching over it will only hide it.
- Wear basic PPE: safety glasses and a dust mask or respirator when sanding.
Tools and Materials
- Self-adhesive mesh patch (large enough to overlap the hole by at least 1 inch on all sides)
- Joint compound (lightweight all-purpose works for most small patches)
- 6-inch drywall knife, plus a 10–12-inch knife for feathering
- Utility knife
- Fine sandpaper or a sanding sponge (around 120–220 grit)
- Damp cloth or sponge
- Primer and matching paint
How to Patch a Hole in Drywall With Mesh: Step by Step
Step 1: Clean up the hole
Trim loose paper and crumbling chunks with a utility knife. Lightly sand around the edges so nothing sticks out, then wipe away dust with a damp cloth. The adhesive on the patch won’t bond to dusty, flaky surfaces, and the patch will lift later.
Step 2: Size and apply the patch
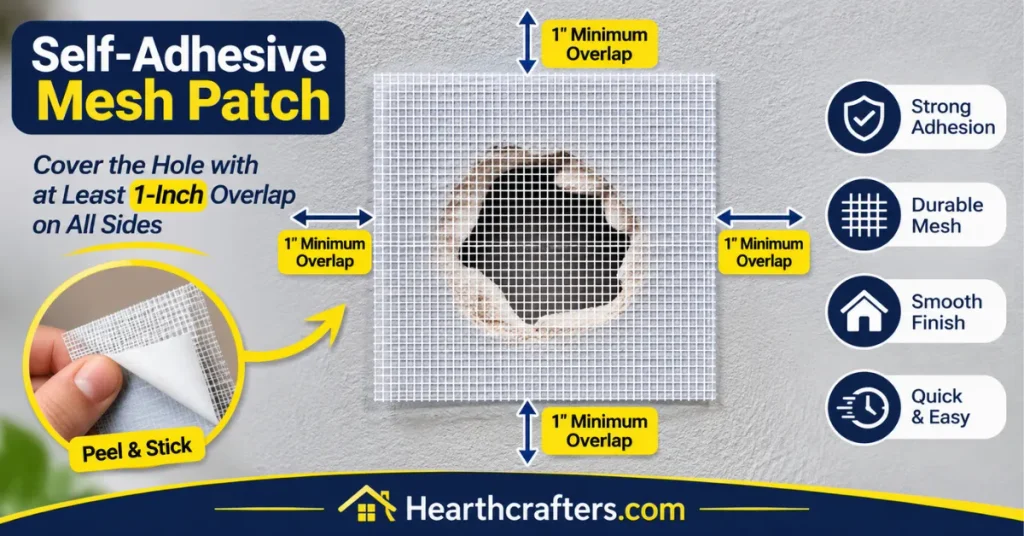
Choose a patch that overlaps the hole by at least 1 inch on every side. Peel off the backing, center the patch over the hole, and press from the middle outward to avoid wrinkles. Run your finger along the edges so the whole patch is stuck flat.
Step 3: Apply the first coat
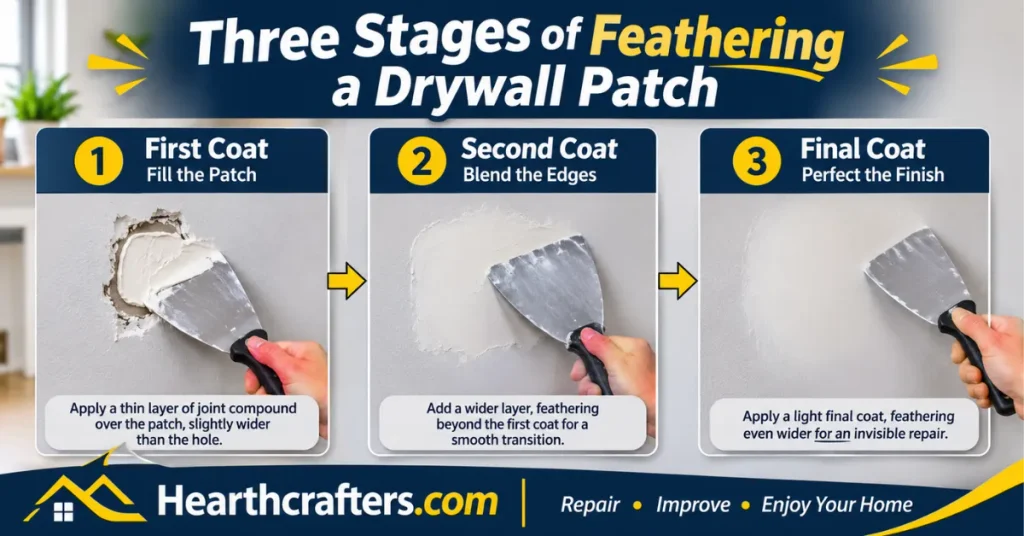
Load a 6-inch drywall knife with joint compound and spread it over the mesh, pressing the compound into the openings in the mesh. A crisscross pattern helps fill the weave. The goal of this coat is to cover and bond the mesh, not to make it smooth. Extend the compound a few inches past the patch edges, then let it dry according to the label, since drying times vary by product, thickness, and humidity.
Step 4: Apply the second coat
Once the first coat is fully dry, knock down any ridges with the knife. Use a wider knife (10–12 inches) for the next coat, spreading it a bit past the first coat’s edges. Hold the blade at a shallow angle and pull toward you so the compound thins out at the borders. Feathering is what keeps the repair from showing as a raised square.
Step 5: Add a third coat if needed
If you can still see mesh texture or low spots after the second coat dries, add a thin third coat. Several thin coats beat one thick one, because thick compound dries slowly and tends to crack.
Step 6: Sand smooth
When the final coat is completely dry, sand lightly with fine paper. Use a gentle touch: sanding too hard can expose the mesh. Run your hand across the area (and look at it sideways under a light) to catch edges you can feel but not see. Wipe off the dust.
Step 7: Prime and paint
Joint compound is more porous than painted drywall, so unprimed patches often show up as dull spots under paint. Prime the whole repair first, then paint. If the wall has a texture (orange peel, knockdown), you may need a texture spray or other matching method before painting, or the smooth patch will stand out.
6 Common Mistakes and How to Fix Them
- Patch shows as a bump: The compound wasn’t feathered wide enough. Add a thin, wider coat and sand again.
- Mesh texture shows through: The first coat didn’t fill the weave. Add another thin coat.
- Cracks appear later: Compound was applied too thick, or applied before the previous coat dried. Remove loose material and redo in thin layers.
- Patch peels at the edges: The wall was dusty or greasy when the patch went on. Clean and re-apply.
- A dull “flash” shows through the paint: The patch wasn’t primed.
- Sanding dust everywhere: Use a damp sanding sponge and cover nearby floors and furniture.
When to Call a Professional
Consider a professional when:
- The drywall is wet, sagging, or moldy, or there’s a leak behind the wall.
- The hole is large, especially in a ceiling.
- You see wires, pipes, or ductwork you can’t identify.
- The home is old enough that lead paint or older wall compounds may be involved and you’re not sure how to handle them safely.
- You’re a renter: check your lease and ask your landlord before repairing.
For any repair where costs matter, local quotes are the reliable way to get a price. Costs vary by region, hole size, ceiling versus wall, and how much matching and repainting is needed.
You May Also Like: Hearthcrafters.com
Frequently Asked Questions
1: Can I use spackle instead of joint compound?
Spackle works for nail holes and shallow dents. For a hole large enough to need a mesh patch, lightweight joint compound is the common choice, though some patch kits include spackle meant for use with their patch. Follow the kit’s instructions.
2: How long does the compound take to dry?
It depends on the product, how thick the coat is, and the humidity in the room. Use the label’s drying time, and wait until the compound has fully dried (it lightens in color) before sanding or recoating.
3: Do I need to prime before painting?
Yes, in most cases. Compound absorbs paint differently than the existing wall, so skipping primer can leave a visible patch.
4: Can I patch a hole in drywall without a mesh patch?
For small holes, you can use a different backing, such as a drywall insert or a backing board. For anything beyond a small dent, a patch or backing gives the compound something to hold onto.
5: Will the patch weaken the wall?
A properly done patch restores the wall surface but is not a structural repair. If the hole is large, near a stud, or in a load-bearing area, consult a professional.
Conclusion
A mesh patch is the simplest way to fix a small to medium hole in drywall: clean the edges, press the patch flat, build up thin coats of compound, feather them wide, then sand, prime, and paint. The result depends less on any single step and more on patience between coats.
Check the age of your home before sanding, look for moisture or wiring before you cut, and move up to a cut-in drywall patch when the hole is too large for mesh alone.
One Comment